Floral Candle Holder

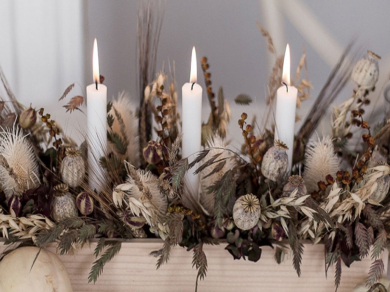
Add a touch of elegance to your home décor with our Floral Candle Holder project. This tutorial will guide you through creating a stunning and personalized candle holder using Bostik’s reliable adhesives and a few simple materials. Perfect for weddings, dinner parties, or everyday ambiance, this DIY project allows you to showcase your creativity while brightening any space with floral beauty. Follow our easy, step-by-step instructions to craft a unique candle holder that combines nature-inspired design with practicality, illuminating your surroundings with a touch of floral charm.
Instructions

Step 1: Sanding

Sand the wooden plates gently.

Step 2: Cutting

Cut the copper tube with a tube cutter or hand saw to create three 7 cm high pieces that will serve as a candle holder. Sand the ends of the tubes to remove any residue.

Step 3: Glue

Glue these tubes onto one of the long wooden plates, spacing them about 5cm apart.

Step 4: Combine

Then combine the 5 wooden plates to create a rectangular tray that will contain the dried flowers. To do this, glue each part together with Bostik Super Glue Gel.

Step 5: Cut the floral foam

Once everything is set, cut the floral foam with a paper cutter. Line the bottom of the wooden rectangle, taking care to accomodate the copper tubes.

Step 6: Plant the flowers

Plant the dried flowers into the foam. Insert the candles into the copper tubes to finish, and set up the festive table.

Attention

Attention, be sure to choose dried flowers that are fireproof, or non-inflammable for safety reasons. Some dry flowers are covered with product to protect against a possible start of fire.

See all products