Cardboard House

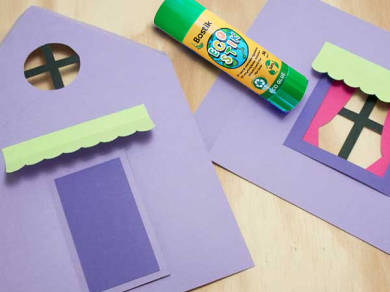
Getting building with our DIY House project! This tutorial will guide you through creating a charming and customisable miniature house using Bostik’s reliable adhesives and simple materials. This project allows you to showcase your creativity while adding a touch of handmade charm to your home decor. Follow our step-by-step instructions to build and decorate your own miniature house, exploring different designs and personalising each detail.
Instructions

Step 1: Prepare your craft

Print the template, put your art smock on and find a clean surface to work on. Make sure you have everything you need.

Step 2: Cut out templates

Use the Blu Stik to glue the templates to your chosen A4 coloured card. Ask a parent to cut out each element with the craft knife and metal ruler. All the small dashed lines then need scoring with the back (blunt side) of the craft knife. Do NOT score the large dashed lines around the windows. HINT: You can also use scissors.

Step 3 : Making the Windows – INSIDE

The template side of the first side should be facing up. Apply the Blu Stik from the edge of the window to the large dashed line. First stick on the curtains, then stick on the square window cross. Repeat for the second side window and the window on the front of the house.

Step 4 : Making the Windows – OUTSIDE

Turn the first side over so the template is facing down. Apply the Blu Stik glue to the template side of the window frame, centre it to the hole and stick it down, then glue the shades over the top of the window. Glue should only be placed on the thin strip above the dashed line. Repeat for the second side of the house, the shade above the front door and front door inset.

Step 5 : Making the House – CONSTRUCTION

Line up the house elements. Left to right: Second side, back, first side and then the front. Apply the Fine and Wide glue to the tab at the side of the Front. Stick the first side on top of the tab. Repeat for the remaining 3 panels. Decorate with Glitter Glue and the coloured markers. Leave to dry.

Step 6 - Making the House – CONSTRUCTION

Apply the Fine and Wide glue to the second side tab and stick it to the inside of the front. Lay the roof, template side up flat on the table. Apply the Fine and Wide glue to long edges of the roof. Turn the house upside down and stick it down carefully to the roof.

Step 7: Play

Wait for the glue to dry, then play!

See all products