How to make a DIY plant frame

Plants and flowers are perfect for bringing the outdoors into your home, breathing life and colour into the space. But often, real plants and particularly flowers can have a short lifespan if not cared for properly.

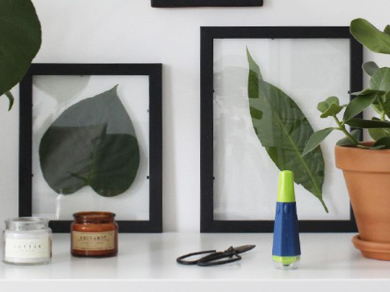
Instead of binning your wilting blooms, reuse them in a framed masterpiece and create your very own DIY plant frame. This step-by-step guide is in collaboration with Shake My Blog, who shows us how to easily transform pretty plants into pressed plant frames that can withstand the test of time.

So, grab your dried foliage, a frame, and our light-activated glue, and #CraftWithBostik!
Instructions

Disclaimer

Please note this guide features images of an adhesive that is now discontinued, however, the step-by-step tutorial is correct to the new product.

Step 1: Prepare the DIY plant frame

If you're using a recycled or broken frame, you will need to repair your frame prior to painting it.

To repair your frame, apply a drop or two of glue to the broken part. Then, hold the glued parts together for 5 seconds to allow an initial tack. Finally, leave to dry for up to 3 minutes to create a secure bond.

Once the glue is dry, it can be sanded so that it is smooth and the repair looks seamless.

Step 2: Paint the frame

Lay old newspaper or an old cloth to protect the work surface. Add paints of choice to a plate. Get creative and using a paint brush, mix shades together to create the perfect colour.

Then, apply the paints to the frame with the paintbrush as desired and leave to dry. We chose a beautiful, bold black to stick with a minimalist theme.

Step 3: Attach the leather cord

Once your picture frame has dried, you're ready to attach the cord.

Apply a blob or two of glue to one corner of the frame and press the cord into the glue taking care not to get it on your fingers. Hold the cord in place for 5 seconds to create the initial bond before leaving to dry for 3 minutes.

Repeat this process on the opposite corner to create a hanger for your DIY plant picture frame.

Step 4: Add the pressed plants and flowers

Once you've created the basis for your pressed plant frame, it's time to add the foliage. Place as many leaves or flowers in your chosen design onto one of the glass planes.

When you're done, cover your design with the second glass plane - your DIY plant picture frame is now taking shape!

Tip

If required, you can use Glu Dots to stick your items in place so that they do not move. Glu Dots are transparent so will go unnoticed on glass and clear plastic.

Step 5: Hang your masterpiece

That's it! You now have framed pressed plants that you can hang up and display around your home - a perfect addition to jazz up plain white walls or a bare dressing table.

Go that one step further and repeat our step-by-step guide to make multiple DIY plant frames and create your very own gallery wall.

Tag us in your creations on Facebook and Instagram with the hashtag #CraftWithBostik!

See all products